Important Helix Ultimate is a direct successor of Helix3, but they are two separate products. This is a major release, if you are using WarpTheme template based on Helix 3 framework, please backup the site before updating the template.
Overview
If you are using the template based on Helix 3 Framework and the new WarpTheme update using Helix Ultimate Framework, you can follow this tutorial to implement the new features.
Helix Ultimate and Helix 3 are two different template frameworks. That means there is no simple update from Helix3 to Helix Ultimate, it requires the upgrade manually, in this tutorial, you will learn how to upgrade the theme from Helix 3 to Helix Ultimate.
Modules & Positions
New Positions
| Position | Description |
|---|---|
toolbar-left toolbar-right |
These positions are located above the theme header by default. Find the toolbar settings in Layout → Site. |
logo-mobile |
This position can be used instead of the Mobile Logo set in the Basic → Logo settings. |
navbarheader |
These are the theme header positions. Find the header and navbar settings in Basic → Header. |
Note You still can publish a menu module in the menu module position. It works as same as the new navbar position. The menu position is backward compatibility for the helix3 based theme.
Usage
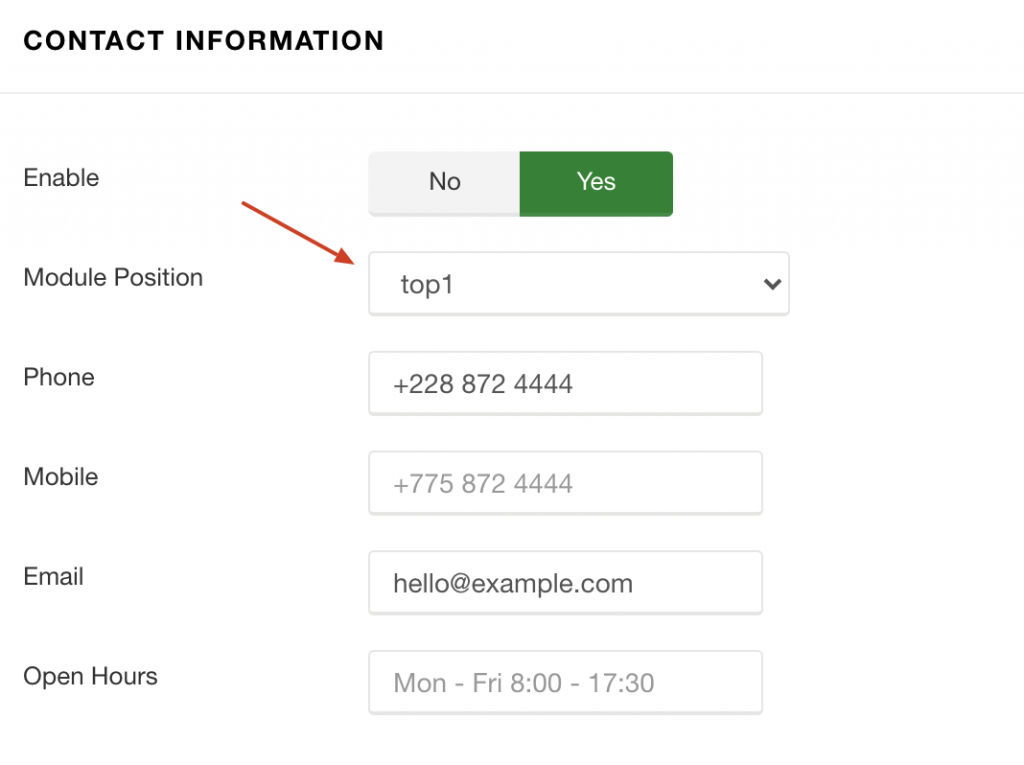
Old Helix3 based themes using top1 and top2 positions for the Top bar(these positions are located above the theme header), with the new upgrade, these positions are changed to toolbar-left and toolbar-right. After upgrading process, you need to re-config these positions if needed.
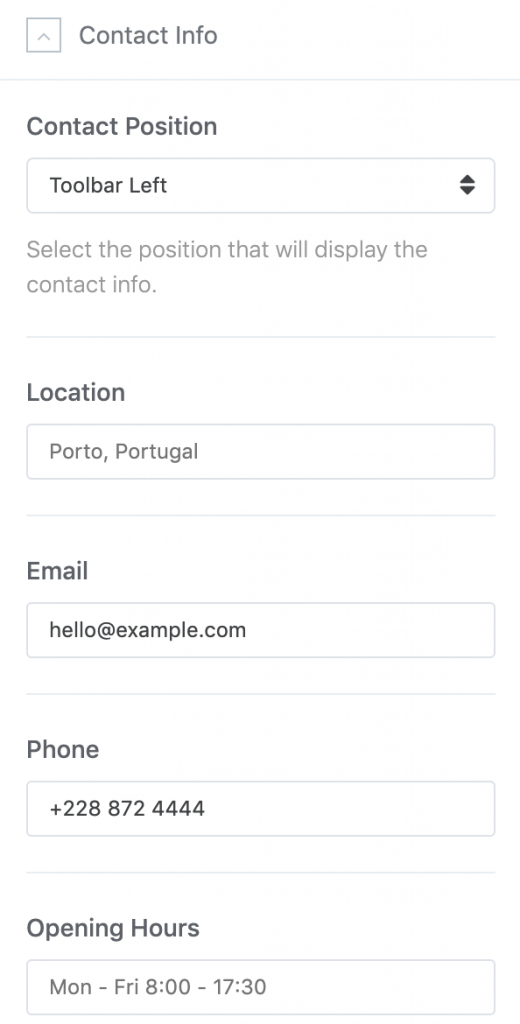
Example from Helix 3 based themes, you have assigned the contact information to top1, after upgrading, simply assign the contact information to toolbar-left position.
Old Helix 3 based theme:
New Helix Ultimate based theme:
Helix Ultimate Folder Structure
| Folder/File | Description |
|---|---|
/css |
Contains all CSS files of the theme. |
/features |
Contains the core files responsible for displaying all theme feature variations. |
/fonts |
Contains the fontawesome 5 files. |
/headers |
Contains the core files responsible for the predefined header layouts. |
/html |
Contains all modules/components override for the theme. |
/images |
Contains all image files of the theme. |
/js |
Contains all JavaScript files of the theme. |
/scss |
All SCSS files of your theme are stored in this folder. |
/comingsoon.php |
Provides the complete HTML markup for the comingsoon page layout. For more information, take a look at Comingsoon section. |
/component.php |
This file provides the logic for the display of the printer friendly page, "E-mail this link to a friend." etc. |
/error.php |
Provides the HTML markup for the error page layout |
/helper.php |
This file loads the helper classes for voting article feature. |
/index.php |
Includes layout calculations and assembles the theme's CSS and JS files. |
/offline.php |
Provides the HTML markup for the offline page layout |
/options.json |
Stores the saved theme settings. |
/options.xml |
Defines the theme settings. |
/templateDetails.xml |
This file contains general information on your theme, like the name, release date, directories and module positions. |
Deprecated files/folders
Helix3 based themes included layout/default.json and /less folder. These folders/files will be ignored after upgrading to Helix Ultimate theme, the new Helix Ultimate based themes using SASS /scss for styling and theme customizer using options.xml (Helix3 based themes are defined the theme options via templateDetails.xml)| Files/Folders | Replace width |
|---|---|
| /layout/default.json |
options.json
Helix Ultimate uses options.json to stores the saved theme settings. |
| /less/ | /scss/ Helix Ultimate using Sass for theme styling. |
| /features/preloader.php/ | With Helix Ultimate theme, the Preloader feature is integrated directly via index.php. |
| /css/bootstrap-rtl.min.css /css/frontend-edit.css /css/legacy.css |
These css files are not needed, you can safely remove these files if needed. |
| /js/frontend-edit.js /js/jquery.countdown.min.js /js/jquery.sticky.js |
These js files are not needed, you can safely remove these files if needed. |
Migration
Requirements Again, this tutorial is used for the theme that ported from Helix 3 to Helix Ultimate. We are working to move all Helix 3 based themes to Helix Ultimate, you will receive an email notification about the upgrade for any theme soon.
In this tutorial, we will migrate the WT Garden theme from Helix 3 framework to Helix Ultimate framework that we are working on. We will release the new Garden theme based on Helix Ultimate in the next working days.
Old Garden Layout
First, please take a look the old Garden layout with Helix 3 framework
Layout Grid Back-end: Top Bar and Header are added directly via Layout Grid builder, with new Helix Ultimate themes, these rows are removed and replaced with Predefined Headers and Toolbar Left/Right position. These toolbar positions are located above the theme header.

and the content layout rendered via front-end

Migration Steps:
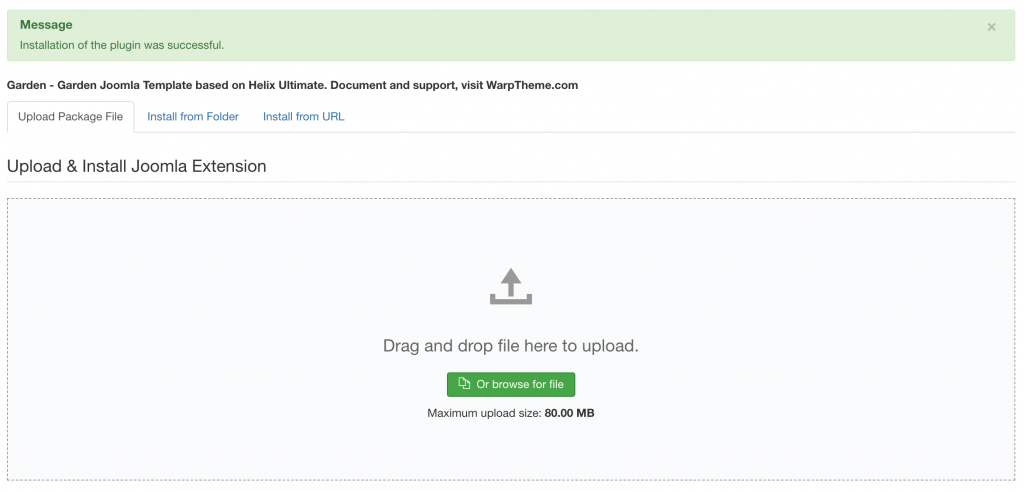
1. Install new Garden theme.
Install the new Garden theme based on Helix Ultimate into your existing Joomla site using old Garden theme with Helix 3 framework.
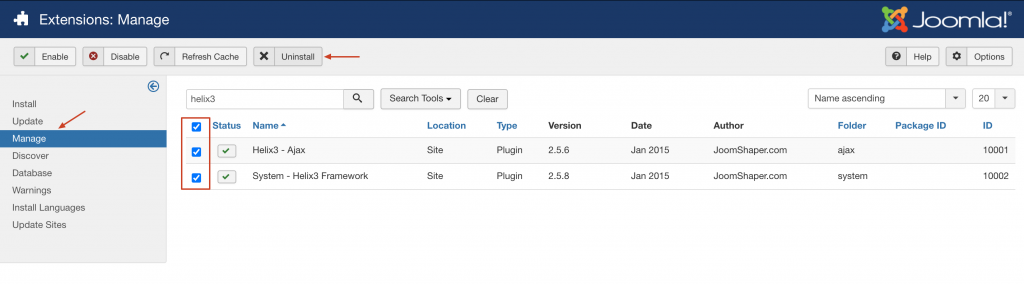
2. Remove old Helix 3 plugins
Next, access Joomla extension manage(Extensions → Manage) then search for Helix 3. Uninstall two plugins Helix3 - Ajax and System - Helix3 Framework. New Garden theme using Helix Ultimate framework, you need to remove old Helix 3 plugins to avoid the conflict between two frameworks.
3. Remove old layout grid and generate the new theme layout
Helix 3 framework using Bootstrap 3 for layout grid and Helix Ultimate Layout is based on a 12 column layout from Bootstrap 4. You need to remove the old layout grid from Helix 3 and generate the new layout grid.
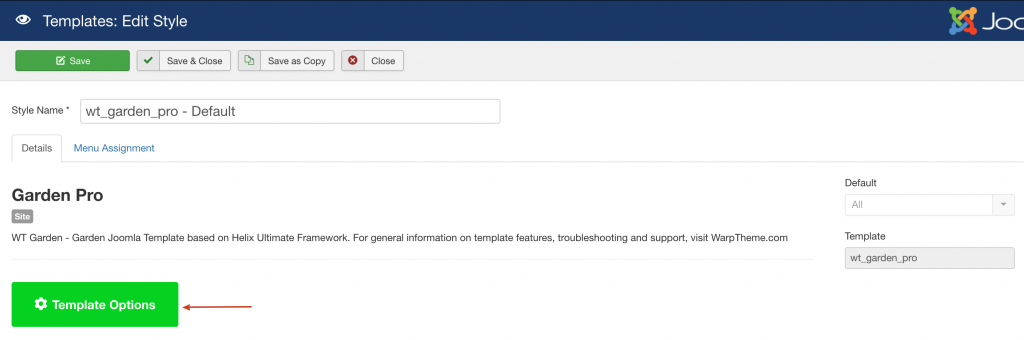
Go to Extensions → Templates → wt_garden_pro → Template Options
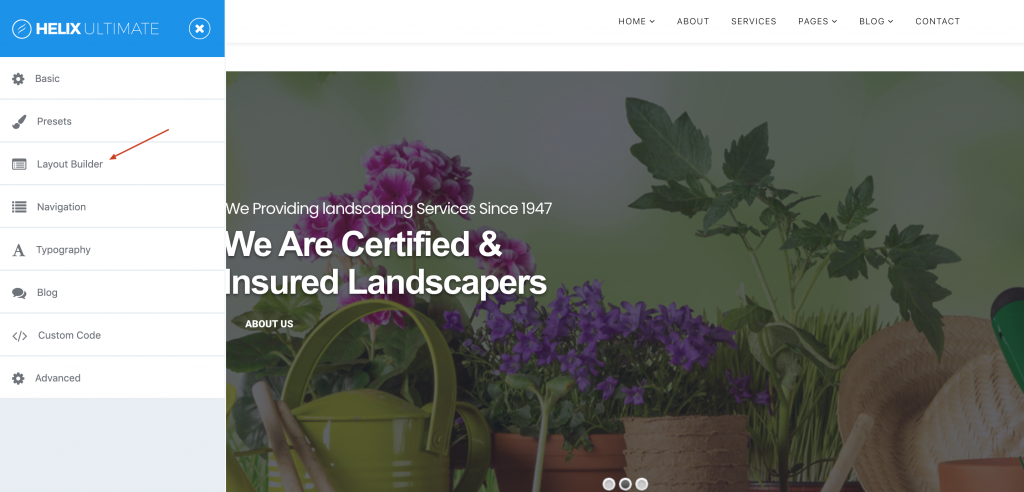
Click Layout Builder then remove all existing rows by clicking the trash icon. Remember that existing rows/columns are generated by Helix 3 framework, the layout is not compatible with the new Bootstrap 4 layout for Helix Ultimate, we will remove the existing layout and generate the new one.
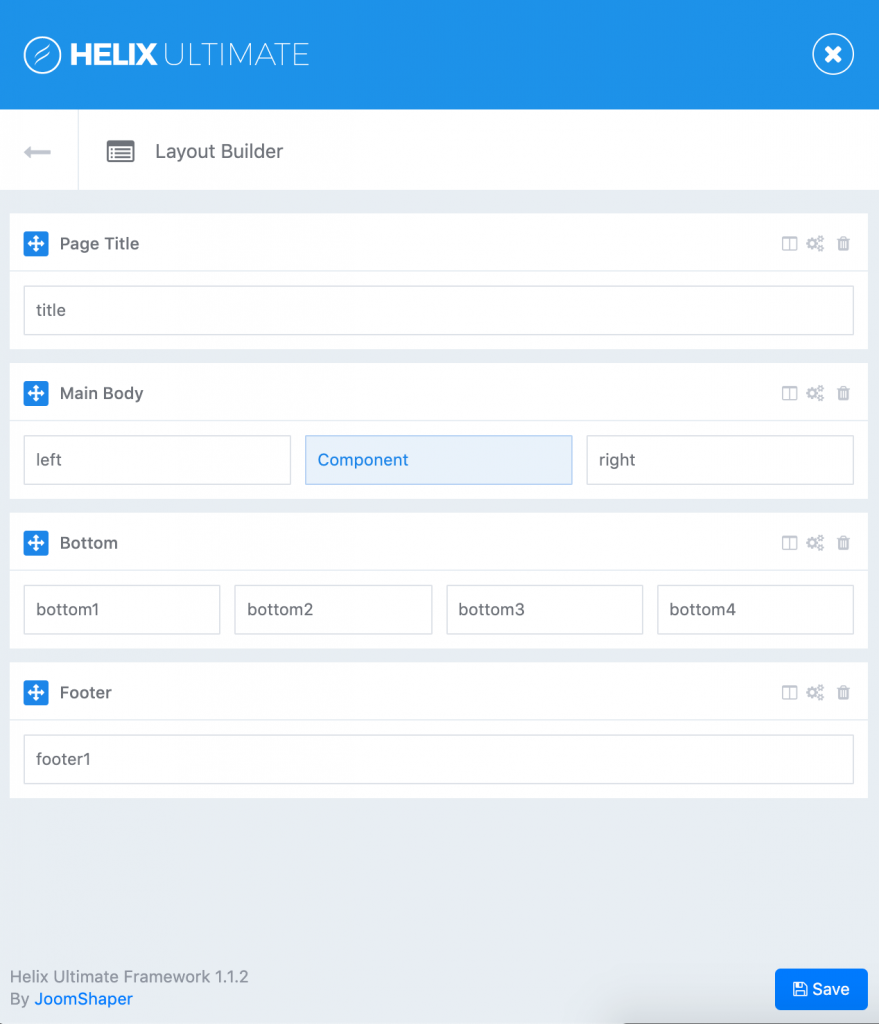
Here you can see all grid columns are not assigned correctly due to the issue between bootstrap 3 and 4 framework, simply remove all grid rows from Layout Builder panel and click Save

Save and reload the page to see the new Layout grid

Here the brand new Layout Grid for Garden theme generated by Helix Ultimate with Bootstrap 4.
Now you can see the content rendered correctly via Front-end, however, the Toolbar(Topbar) and Header(including logo and menu) are missing. We will going to add the logo, contact info and assign the predefined header in the next steps.

From old Helix 3 layout, we have defined the Topbar and Header directly via Layout grid builder, with the new theme update, you don't need to do that, the Top bar and Header builder are optional.
3. Re-config the logo, header and toolbar(topbar).
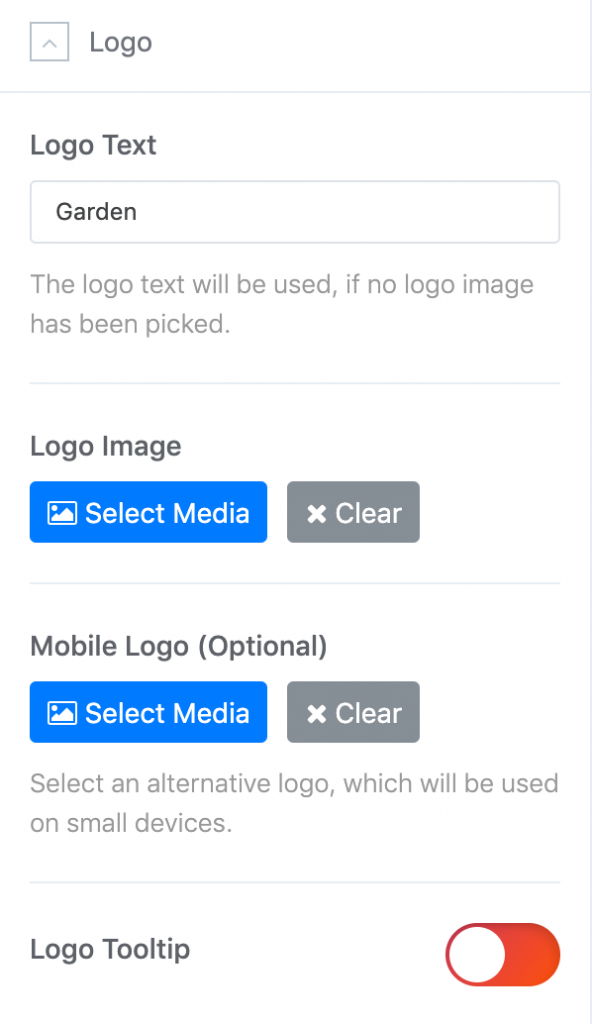
3.1 Re-config the logo.Click Basic → Logo and upload your logo here.
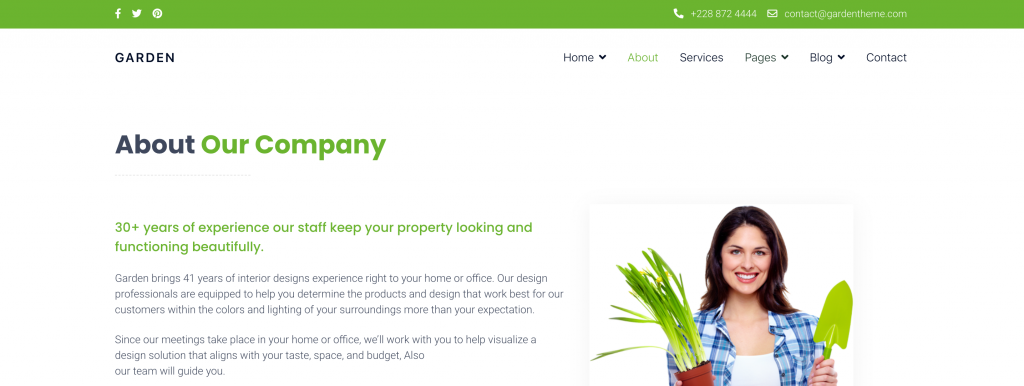
Enable Predefined Header layouts and choose the header layout to suite your needs. Our Helix Ultimate based theme supports 18 header layout types. In this case, the Navbar Right header is selected because it looks the same with Old Garden header layout.

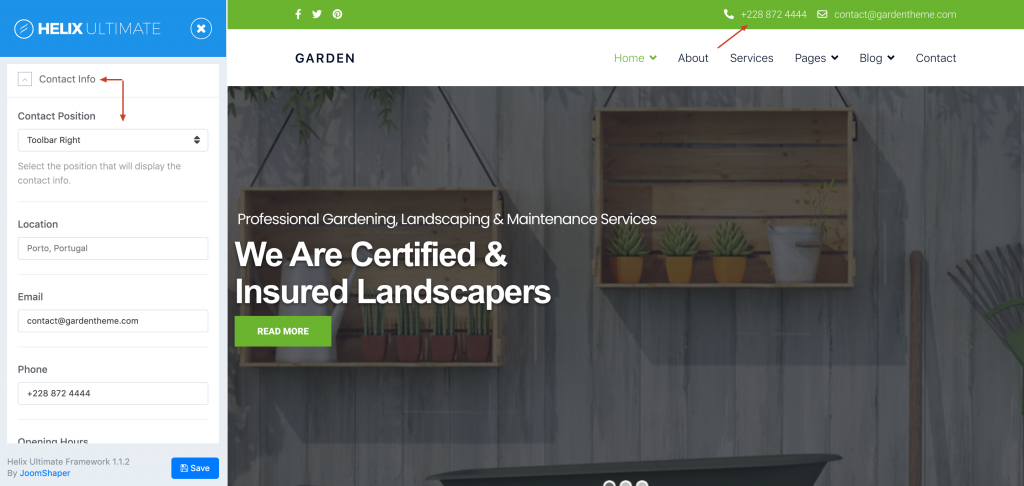
At the same Header section, scroll down to Social Position and select Toolbar Left position that will display the Social Icons.

Customize the contact info of your website, select the Toolbar Right position that will display the contact info. The following settings can be found in the Basic → Contact Info → Contact Position.
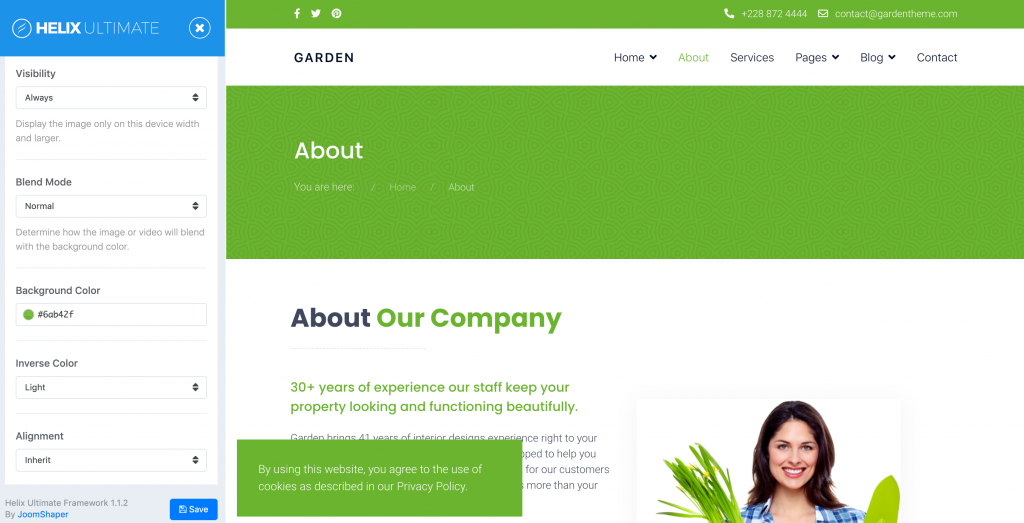
Last, we will enable the cookie notification for the theme, the Cookie Banner settings can be found in the Advanced → Cookie Banner

4. Re-config the Page Title for menu items.
The page title from Helix 3 and Helix Ultimate are different, so you need to re-config the page title for menu item that using this feature before.
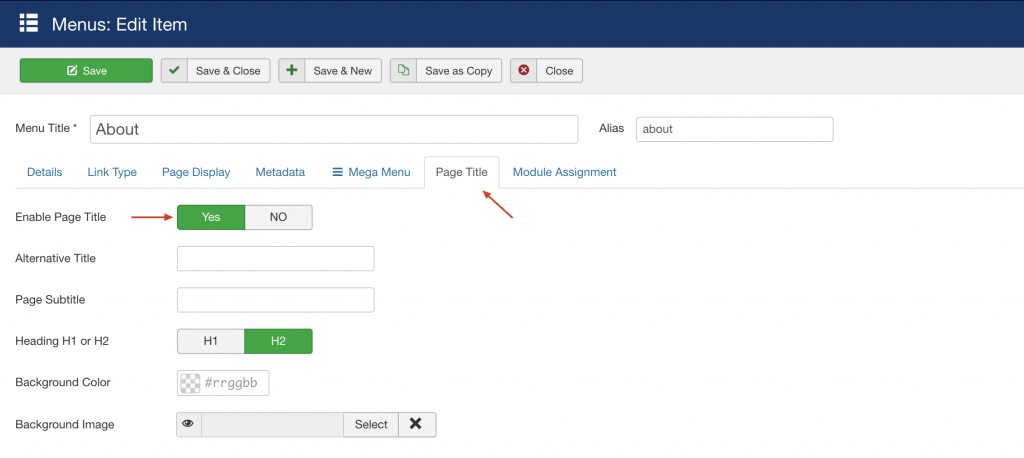
For more information on general options for the Page Title displayed in the theme customizer please have a look at the Page Title documentation section.
Class 'HelixUltimateFeaturePreloader' not found
The preloader animation class from Helix3 is no longer needed. If you face the issue Class 'HelixUltimateFeaturePreloader' not found , simply go to template-root folder → Feature folder → then remove preloader.php file.
Css Issues
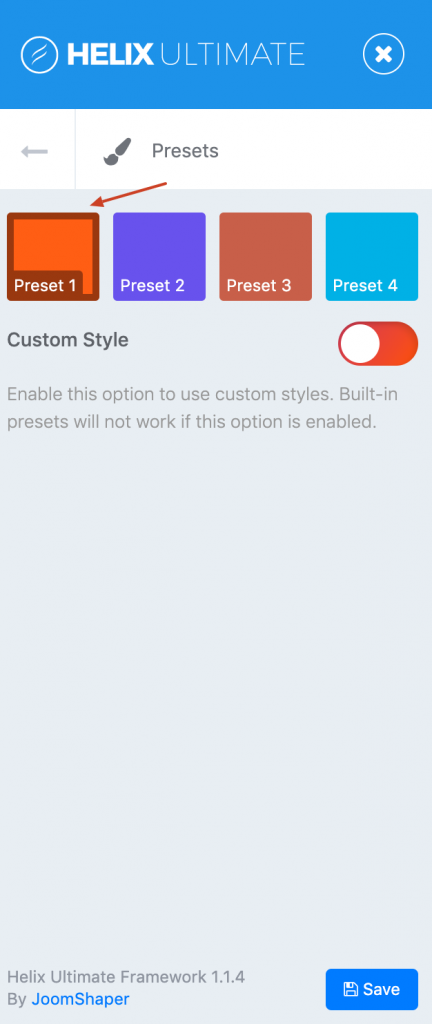
After installing the new theme update, if your website does not work as you expect, like the css layout, font size, etc, to resolve these issues, go to Presets then set the default color preset for the theme.
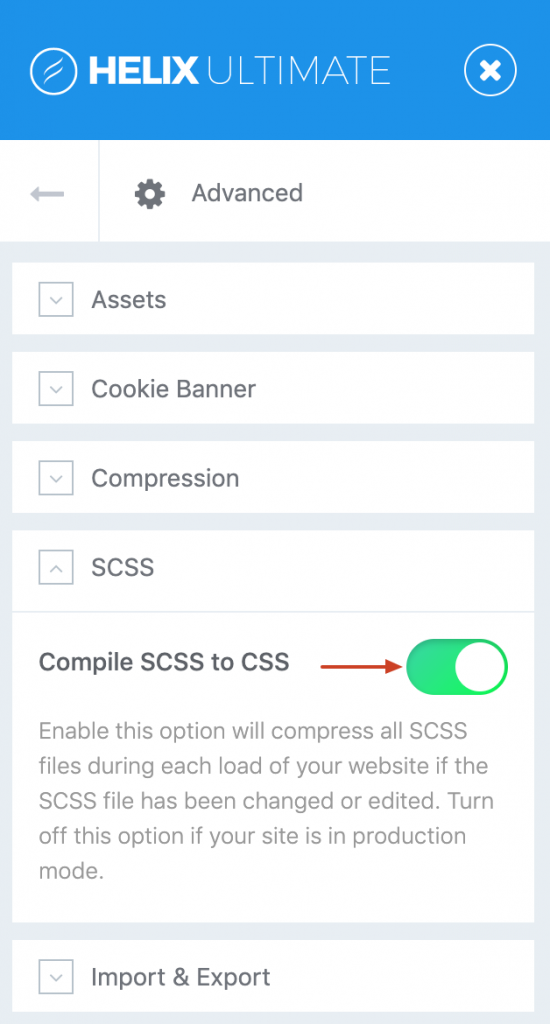
Next, go to Advanced → SCSS then enable Compile SCSS to CSS feature. Remember clear Joomla caches and browser caches and check the site again.
- Getting started
- Overview
- Modules & Positions
- File Structure
- Deprecated Files
- Troubleshooting
- Preloader Not Found
- Css Issues