Introduction
This document covers the installation and use of this template and often reveals answers to common problems and issues - we encourage you to read this document thoroughly if you need an in-depth guide on how to use the template.
If you have any questions that are beyond the scope of this document, feel free to ask via ticket support system: WarpTheme Ticket System
To get access to the ticket system, create an account on this page: Create an AccountOverview
Craftsman | Construction Joomla Template is a creative, clean & modern multi-page template made for especially construction business. Well written codes make you comfortable to redesign the theme at your own requirements. Craftsman is powered with Warp 7 framework, Quix Page Builder.

Craftsman has been built on Warp 7 Framework, Quix Pagebuider PRO, using the latest web techniques. This template comes packed with widgets and an intuitive live customizer.
The underlying Warp 7 Framework gives the template an immeasurable weight of flexibility and agility, fast loading site using built in compression of files, data URIs and gzip compression.
Template Features
- Available for Joomla.
- Quix Pagebuider PRO Support
- Unite Revolution Slider included
- Fully Responsive
- Built in Gzip Compress and Data URI function for faster site loading
- Unlimited Colors Customization
- RTL Language Ready
- Cross browser compatibility
- Light and fast loading
- SEO Friendly
Built on Warp 7 Framework
WT Craftsman is built on a very robust framework to give you un-matched flexibility and speed when it comes to building the template layer of your site.
Warp 7 is a class of it’s own. Underneath the framework, it uses UIkit, a lightweight and modular front-end modular framework for developing fast and powerful web interfaces using the latest web technologies.
1. Responsive Design
A fully responsive layout that adapts perfectly for all device resolutions like mobiles, tablets and desktops.
All of the Warp templates are adaptable. Yep, just like this. From the box. This feature can be turned off, it also can be adjusted. See how easy you can customize adaptive widgets:

The user simply sets how a particular block should look on different devices. That’s all. Easy and convenient.
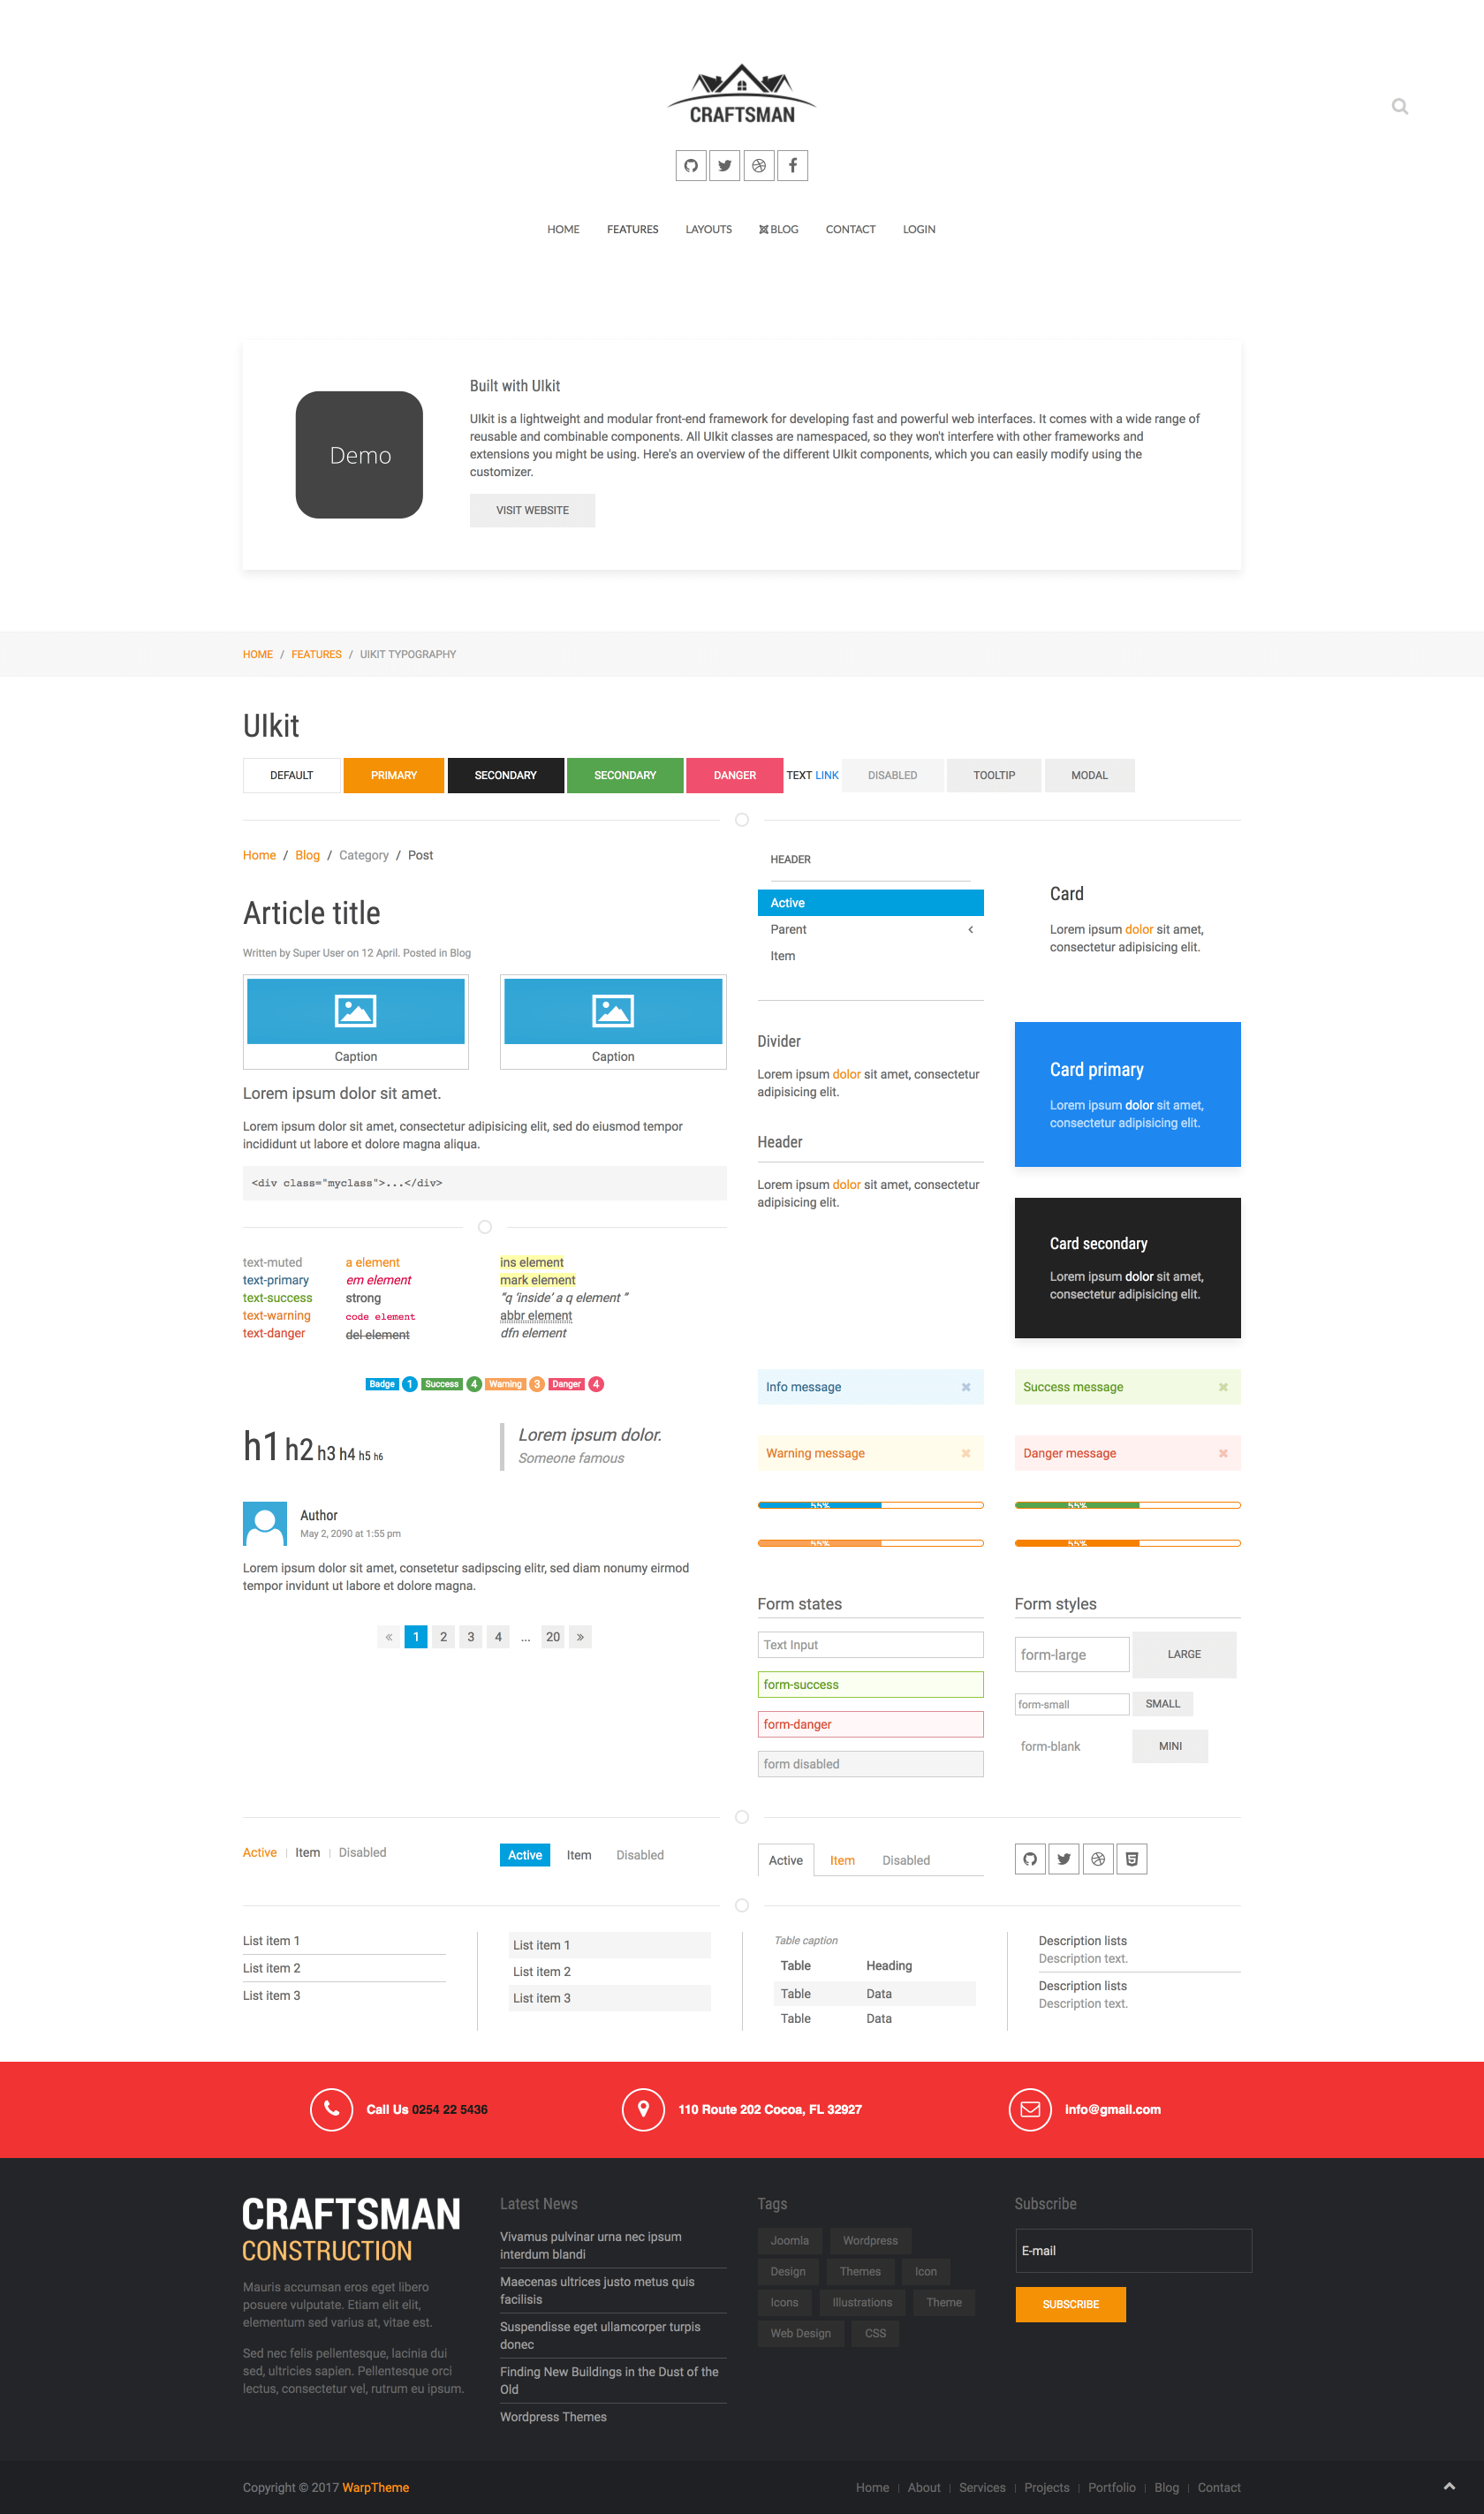
2. UiKit
UIkit – wonderful analogue of bootstrap. The latest version (Warp 7) has the latest version UIkit inside. A developer can easily run various functions and a user can easily use them.
3. Styles
4. Layouts
Support multi Layouts. You can create an unlimited number of Layouts and combine them with an unlimited number of styles. It’s fantastic what can be done with just these two pieces: Styles and Layouts.
5. Sidebars
The sidebar management (not to be confused with the positions of the widgets, they are also often called Sidebars) is very simple and flexible.

You can place on the left or put them on the right side. Their width and display are adjustable. Everything is sleek and simple.
6. Widgets
Unfortunately, there aren’t many opportunities to manage widgets on pure WordPress. You can either display them or hide. This is not enough. Fortunately, there is a huge amount of all sorts of plugins that solve this problem. Warp 7 offers a nice solution, built right into the template.
You don’t have to use 3-4 plugins for managing widgets anymore; everything can be done right from the template.You can manage the headers display for each widget separately, You can attach a widget to certain pages or categories, You can set the style of the widget, add a badge or icon, can manage its behavior if widget is responsive. Moreover, if this is not enough, You can prescribe for the widget class of its own, and stylize it individually. That’s great, isn’t it? You need only WordPress and Warp template to create anything you like.

7. Menus
Menu management – This is an important part of a website. Key part. Warp has a great tools menu management and its display. The user can customize the behavior of pop-up menu, add a subline to the items and icons. Just to bring a beauty. All of this we can do without any plugins. All of this is inside the template.

8. Compression

No matter how many icons you have added to styles, no matter how many scripts or how many LESS and CSS files. Template will compress all of this and produce a single file. Quickly. Nice. Google will appreciate this.

9. Development
Warp has a well-considered architecture and logical structure so you can easily extend or modify the functionality.10. Advanced features
Getting Started
When you purchase our Joomla! template or WordPress Theme, you'll then be taken to the Downloads page. Click on the "template/theme" file name to download or generate invoice to suite your needs

After downloading our product you’ll find the following files/folders within:
11. Simple Customizer
Use the customizer to create your own style. You can pick colors, modify sizes and much more with a real time theme preview. Choose the style to be loaded in the layout options.

Joomla! Template Packages
wt_craftsman_pro_j3x_installation_1.0.0- The stand-alone Joomla! template installation package.
WT_Craftsman_Quickstart_Package_1.0.0.zip- A quick-launch Joomla! 3.x installation package that contains all the sample data, images and most extensions to replicate the live demo.
Folder Structure
Template/Theme comprises of LESS, CSS, Javascript and PHP files that power the robust underlying Warp Framework. In this section, we are going to cover the css, LESS, js and php files to help you understand the template’s structure.1. CSS Folder
This folder contains css files which render the front-end look and feel of the site. It contains four files:| File | Description |
|---|---|
bootstrap.css |
this file contains the css for bootstrap. |
custom.css |
use this file to add your own custom.css. |
ie9.css |
this file fixes issues related with Internet Explorer 9 browser. |
theme.css |
this file contains the css for the template. It is compiled from less/theme.less. |
.css or bootstrap.css directly as they are automatically generated when you compile the LESS files. If you want to custom your css code, use custom.css to add your own css code.
2. Fonts Folder
This folder contains custom fonts files.3. Html Folder
This folder contains the overrides for components and modules.4. Images Folder
This folder contains the image files that have been used in the template.5. js Folder
This folder contains the javascript files used in the template.6. Layouts Folder
This folder contains the core files that render the front-end look of the template. The most important file in this folder is theme.php. To understand more about this file, please read this article: Layouts Folder.7. Less Folder
This folder contains the less files which in turn, generate the css output files that are located in the css folder. The less files are:| File | Description |
|---|---|
less/theme.less |
Defines the theme style and imports the UIkit theme. This file will be compiled into CSS and saved in the /css folder everytime you hit Compile LESS in the theme settings. |
style.less |
This file defines the unique less code for each style |
customizer.json |
This file defines the customiser parameters that will be displayed in the live customizer. |
8. Warp Folder
This folder contains the actual Warp 7 core framework.Installation
This section covers how to install the template. There are two ways in which you can install the template:- Using Quickstart Package(recommended)
- A demo package is a full Joomla/Wordpress installation, which includes the theme and sample data responsible for the layout and setup of our demo. This is great, if you don't want to start from scratch or just to have a peek at how everything is put together.
- Single template/theme package
- Installing the template/theme in an existing Joomla/Wordpress site.
If you are using Joomla Template or WordPress Theme from other Providers and want to switch to our templates/themes. We will help you config your existing site with our templates/themes. It FREE but for Customers who purchased Pro Unlimited Edition
Quickstart method
What is Quickstart?
Again, Quickstart package is a full website package that includes: templates, extensions, database, images ... and once you install the quickstart successfully, you will have a complete website that is exactly same as our Demo.
Joomla 3 Quickstart Install Requirements
Before starting with the install it’s important that you ensure that your hosting covers the minimum requirements for Joomla! 3.x or WordPress 4.x(We highly recommend SiteGround to host your Joomla! or WordPress site), as the quickstart package for WarpTheme templates/themes will always include the latest compatible version of the CMS:
- PHP 5.3.1 or higher – 5.4+ is recommended;
- MySQL 5.1 (or higher) or PostgreSQL 8.3.x
- Apache 2. x or higher
- XML and Zlib support: Your host’s PHP installation should support XML and Zlib functionality.
- PHP Magic Quotes GPC setting should be off. If this setting is currently on, your web host should be able to correct this.
- Upload the
[template]_quickstart.zipto your server using your preferred FTP software and unpack the contents to your server. A good FTP that we use is Filezilla. In most cases you will unpack it under the public_html folder, www root folder (windows hosting) or the root folder of your server. - Access your site on the browser e.g
http://www.mysite.comand this should direct you to the installation prompt of your Joomla! installation. - Follow the Joomla! installation prompts as you would a normal Joomla! installation. In this step, we assume that you have some very basic Joomla! experience.
- Once the installation is complete, delete the installation folder and your site should look exactly like the demo version.
Video Tutorials
How to install a Quickstart package of a Joomla templateQuickstart Installation
Step 1: Copy the Quickstart pack to the localhost Step 2: Start the installation by visiting the localhost address Step 3: DONE!
Single template method - for existing Joomla! installation.
If you have an existing Joomla! installation, these are the steps to follow:
- Log in to your Joomla! backend e.g.
http://www.mysite.com/administratorand navigate to the Extension Manager. - On the Install section, click on ‘browse’ on the Package File field and locate and select your
[template].ziptemplate package file. Click on‘Upload & Install‘. Once the template has installed successfully you will get a success notification. - Navigate to Extensions > Template Manager and you should see the installed template on the list. To activate your template, click on the default column of the template (second column) to make it the default site template.
- You can further customize the look and feel of the template by selecting the template link to access the admin panel of the template.
Demo Pages
Editing Home page
Log in Joomla Administrator -> Quix -> Pages

Select Home article to edit the home content

Add any type of content to your page with Quix’s large collection of builder elements. You can even load any Joomla modules without leaving the builder. Whatever you are trying to build, the Quix Builder has an element that can help make your dream a reality.

Quix Overview
There are three main building blocks: Sections, Rows, and Elements. Using these things in unison allows you to create a countless amount of page layouts. The basic hierarchy of these elements is as follows:
Sections
Sections are used to create the top-level areas on your website. Sections are made up of rows and columns. See more about rows and elements below.
Rows
Rows sit inside of Sections, and you can place any number of rows in a section. You can add any number of columns in a row and resize the column size. Once you define a Row and created column structure, you can then place elements into the column. There is no limit to the number of elements you can put in a column.
Elements
Elements are the main visual block that makes up your website. Every element that Quix has can fit into any column width, and they are all full responsive in nature.
Getting Started
Upon clicking New button on Quix list pages, you will be, presented with the main Quix Builder interface.

Title - You must provide a title for your page. You cannot save the page unless you provide any page title.
Save - You can save the page by clicking save button, or you can use Quix keyboard shortcuts to save the page.
Close - Close the page and get back to the list page.
Preview - This button will only visible when you save the page. By clicking this button, a new browser tab will open with the preview of this page.

Menu - By clicking menu button, you will see 3 options:

Save To Collection - At any time you can save a layout that you have built to your Quix Collection to be used at a later time. This option is great for using a layout on another page, section of a page, or even another website built with Quix. Collection provide shortcode that can use inside 3pd component as well. For more information about using the Quix Collection, be sure to check out our detailed tutorial on the subject.
Load From Collection - You can also load a layout that you have saved in the past. Quix comes with a lots of pre-made layout, could be a great choice when you first building a website with Quix.
Export/Import - Quix portability system allow you to export your layout and import them to another website built with Quix. Theme developer could ship many page layout with their themes with Quix export option.
Section Options
Every time you add a section you will need to define its properties. By clicking the section setting icon at the top right corner you will be taken to the Section Settings.

Container Mode - Container ensure proper alignment and padding of grid system.
- Stretch With Container- Section stretched to browser width and add container(fixed-width) class.
- Stretch Without Container- Section stretched to browser width and container(full-width) class.
- Add Container - Add container(fixed-width) class into the section.
- No Container - No container class added.
Background Image - If defined, this image will be used as the background for this Section. To remove a background image, simply delete the URL from the settings field.
- Image Repeat - The background-repeat property sets if/how a background image will be repeated.
- Image Position - The background-position property sets the starting position of a background image.
- Image Size - The background-size property specifies the size of the background images.
Background Color - If you would simply like to use a solid or transparent color background for your section, use the color picker to define a background color.
Parallax Effect - Enabling this option will give your background images a fixed position as you scroll. Keep in mind that when this setting is enabled, your images will scale to the browser height.
Custom Padding - Adjust padding to specific values, or leave blank to use the default padding.
Label - Help you to indentify your section in backend. Give a meaningful label so you can understand later.
Id - An automatic ID already assigned for the section. An ID can be used to create custom CSS styling, or to create links to particular sections of your page.
Class - Enter optional CSS classes to be used for this module. A CSS class can be used to create custom CSS styling. You can add multiple classes, separated with a space.
Adding Row and Adjusting Column
After saving your section settings you will need to define column structure for row. You can add as many row with different column structure in a section. By clicking ‘Add Columns’ you will be able to choose from a selection of row types.

Rows also have lots of options that you can use to customize their appearance and alter the structure of the layout. You can change row type anytime by click Change Layout icon bottom right of the row.
Columns are based on 12 grid system and you can adjust column grid by dragging the column divider icon.

Template/Theme Configuration
Setup the menus
After creating your menu
To create the main menu, located at the header: First, create a new menu 'Main Menu'
- Go to the Menu Manager and create a new menu by clicking 'New'.
- Set the menu 'Title' as 'Main Menu'.
- Menu type as 'mainmenu'.
- Position
menu - Click 'Save and Close' button.
- View Screenshot
Module in menu position
You can also publish any module in the menu position. The module name is used as menu item and the module content appears in the dropdown.
Setup the logo
Setting up the logo in Joomla is pretty straightforward. Just create a Custom HTML module in the logo position.
- Go to Extensions > Module Manager > Click on 'New' button > Under 'Select a Module Type', choose 'Custom HTML'.
- On the edit module screen, set the Title as 'Logo'.
- On the right side of the screen, set the Position as 'Logo'.
- Click on the button 'Image' located right under the editor to upload your logo. Be sure to toggle the editor, to set the alt tag, width and height of the logo for SEO purposes.
- Click on the 'Menu Assignment' tab and set the Module Assignment to 'On all pages'.
- Click on 'Save and Close' button.
- View Screenshot
Now you can enter your markup in the Custom output field.
![logo]()
NOTE Warp 7 also provides the logo-small position, where you can display an alternative logo image for smaller viewport sizes.
To add the small logo that appears on smaller device screens, do the following
- Go to Extensions > Module Manager > Click on 'New' button > Under 'Select a Module Type', choose 'Custom HTML'.
- On the edit module screen, set the Title as 'Logo Small'.
- On the right side of the screen, set the Position as 'logo-small'.
- Click on the button 'Image' located right under the editor to upload your logo. Toggle the editor to HTML mode to set the alt tag, width and height of the logo for SEO purposes.
- Click on the 'Menu Assignment' tab and set the Module Assignment to 'On all pages'.
- Click on 'Save and Close' button.
- View Screenshot
Setup the menus for WORDPRESS
To tell your theme what should be rendered as your main navigation, we need to setup a menu in WordPress and assign it as our main navigation.
First of all, you need to create a new menu and add your menu items. For detailed instructions, see the WordPress documentation. In this example we add all existing pages by default and remove one that we do not want.
Now we just need to select the freshly created menu to be used as the main navigation on our site. Hit the Manage locations tab on the top and select the menu from the dropdown.
Menu on small devices
The default menu will be hidden on small devices. You can and should use the offcanvas position to have a mobile friendly version of your menu. The offcanvas element can be toggled from a menu icon. You can also publish other widgets in this position, but a menu is the most likey thing you'll want in any case.

Menus in any position and menu styles
You can create any number of menus you like and publish them as a Custom Menu widget in the Widget area of the WordPress backend. You can assign that widget to any position you like.
There are three different menu styles, the Mega dropdown menu as a main menu, the Accordion menu in sidebars and the Line menu in the toolbar or footer. Warp automatically styles the menu according the position it is published in.
Search Box
- Go to Extensions > Module Manager > Click on 'New' button > Under 'Select a Module Type', choose 'Search'.
- In the edit module screen, set the Title as 'Search box'.
- On the right side of the screen, set the Position as 'Search'.
- Click on the 'Menu Assignment' tab and set the Module Assignment to 'On all pages'.
- Click on 'Save and Close' button.
- View Screenshot
Setting up the Login form
To add the Member Login which is located at menu position, follow these steps;
- Go to Extensions > Module Manager > Click on 'New' button > Under 'Select a Module Type', choose 'Login'.
- In the edit module screen, set the Title as 'Login'.
- On the right side of the screen, set the Position as 'Menu'.
- Click on the 'Menu Assignment' tab and set the Module Assignment to 'On all pages'.
- Click on 'Save and Close' button.
- View Screenshot
Finally, Create the mobile menu by doing the following:
- Go to Extensions > Module Manager > Click on 'New' button > Under 'Select a Module Type', choose 'MainMenu'.
- On the edit module screen, set the Title as 'Offcanvas Menu' and on Select Menu select the 'Main Menu'.
- On the right side of the screen, set the Position as 'offcanvas'.
- Click on the 'Menu Assignment' tab and set the Module Assignment to 'On all pages'.
- Click on 'Save and Close' button.
- View Screenshot and Result View Screenshot
Setting up Breadcrumbs
- Go to Extensions > Module Manager > Click on the 'new' button > Under 'Select a Module Type', choose 'Breadcrumbs'.
- Set the title to 'Breadcrumbs' and on the right side of the screen, set the module position to 'Breadcrumbs'.
- On the Menu Assignment tab, set the Module Assignment to 'On all pages except those selected' and select the pages you do not want the breadcrumbs to appear.
- Click 'Save and Close'.
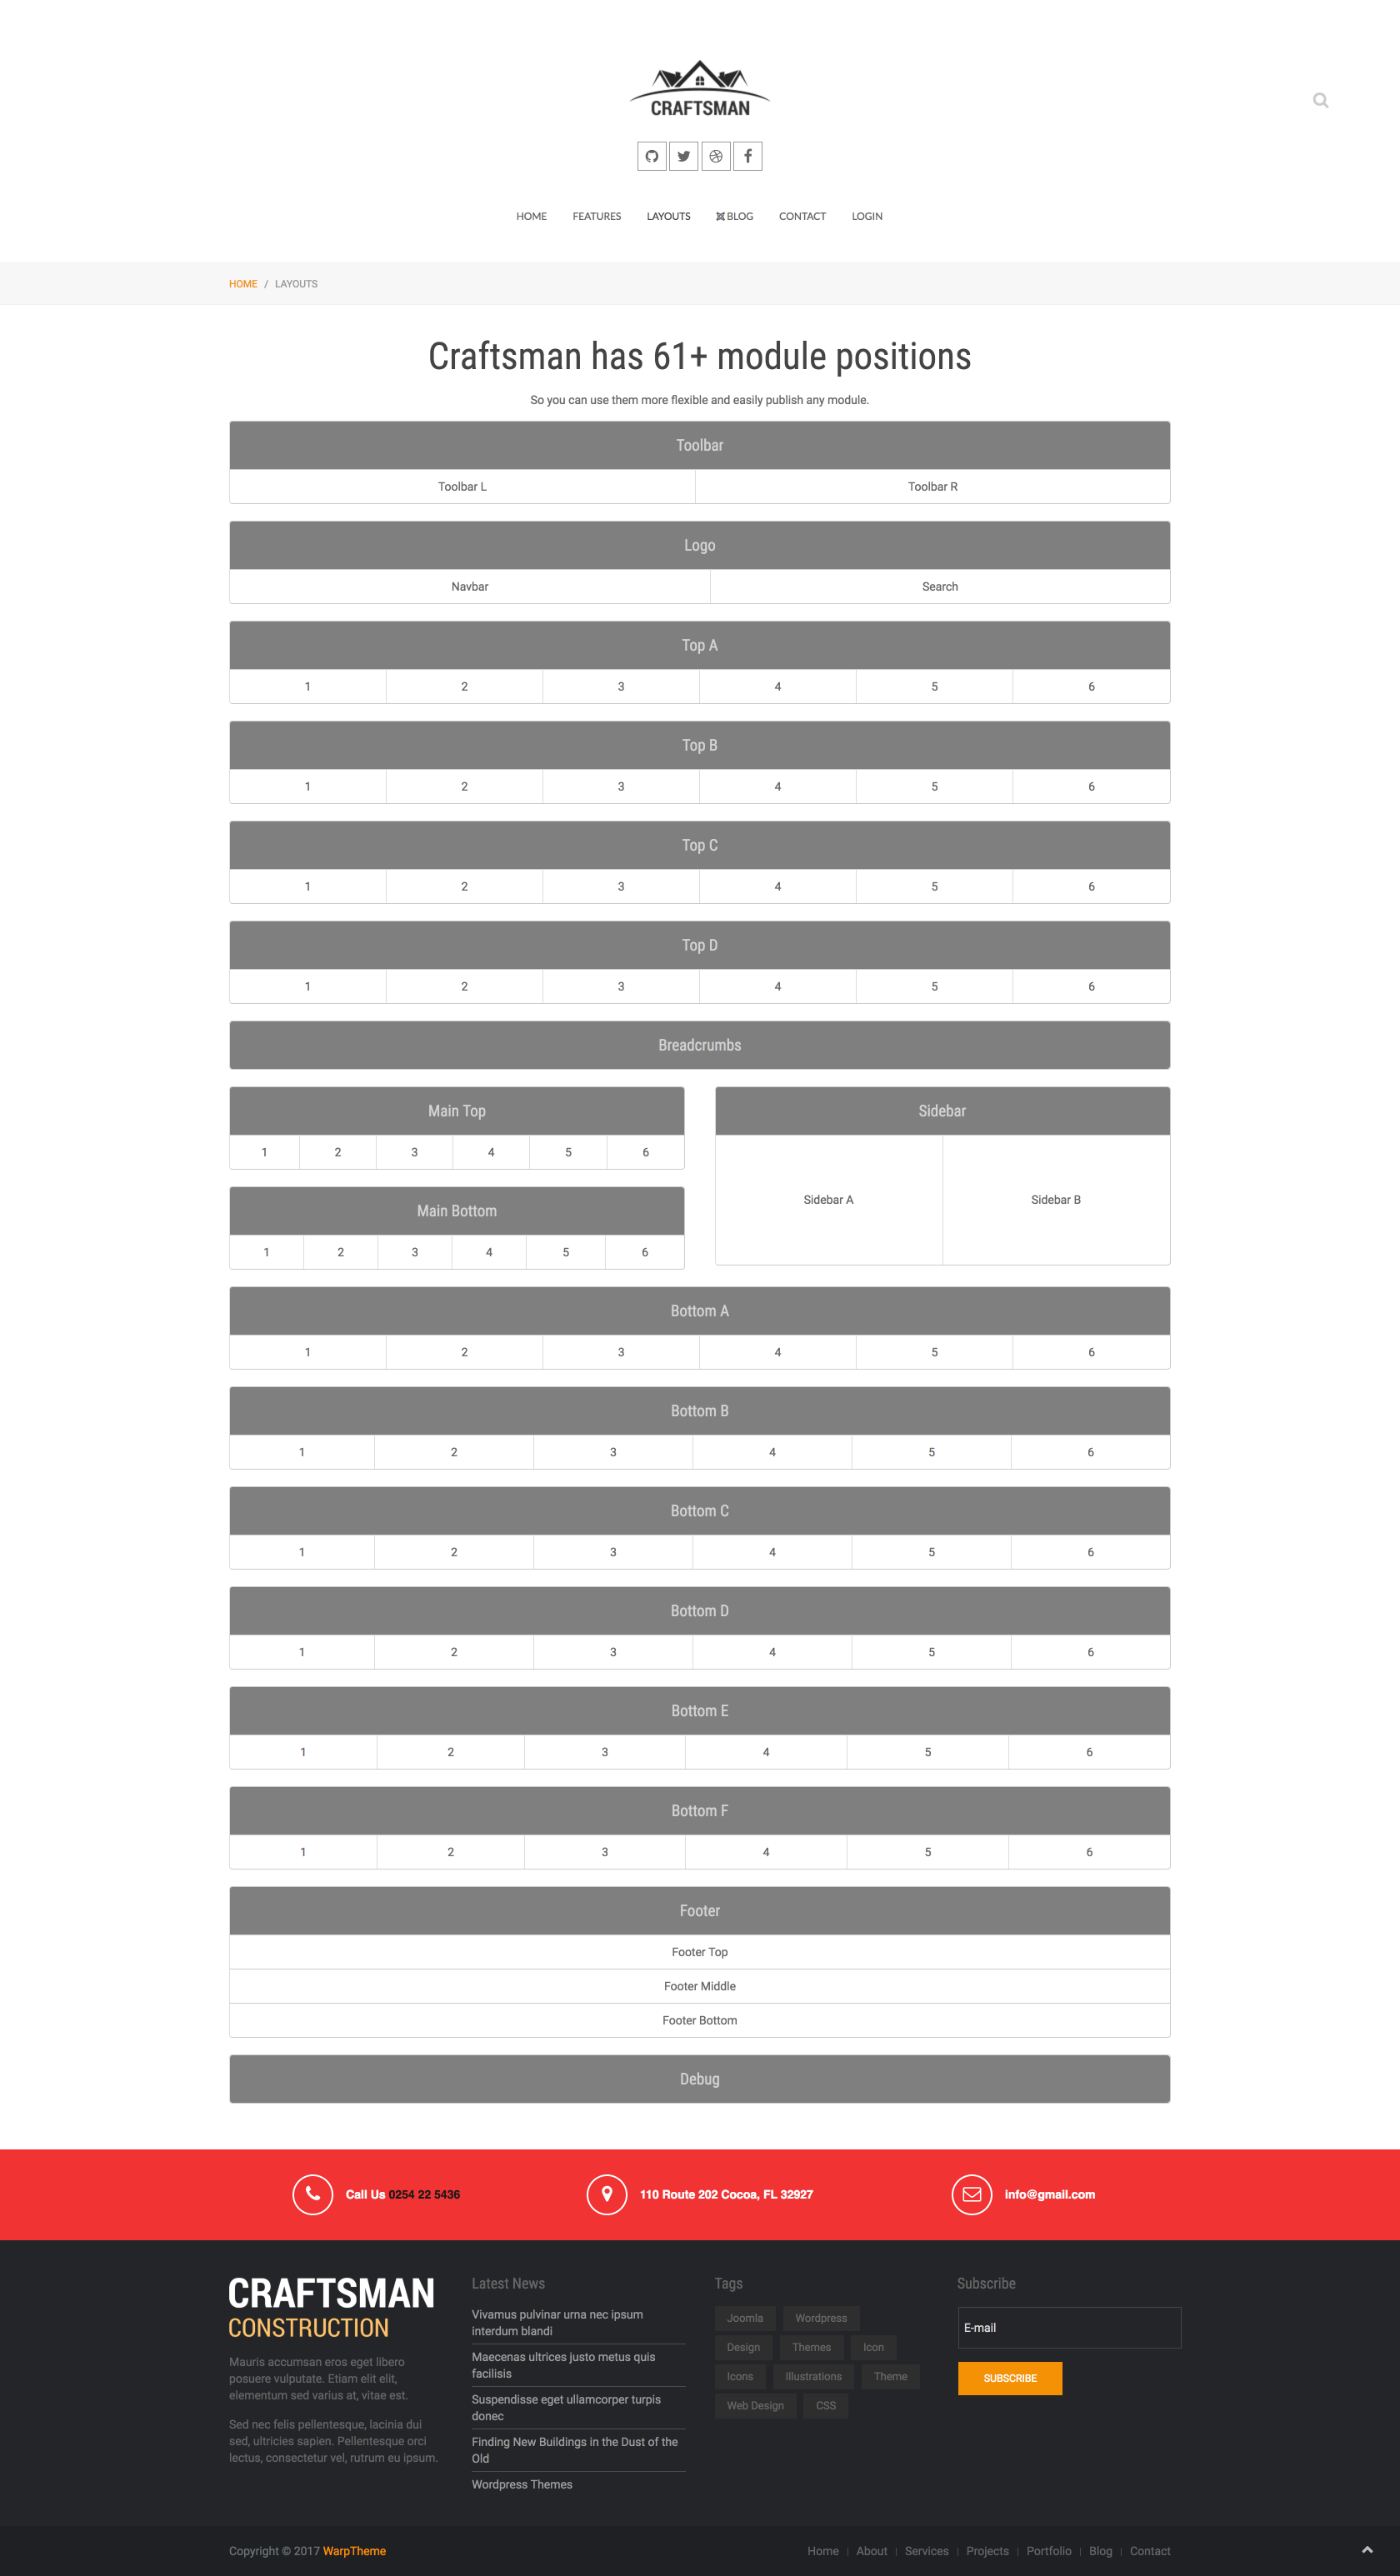
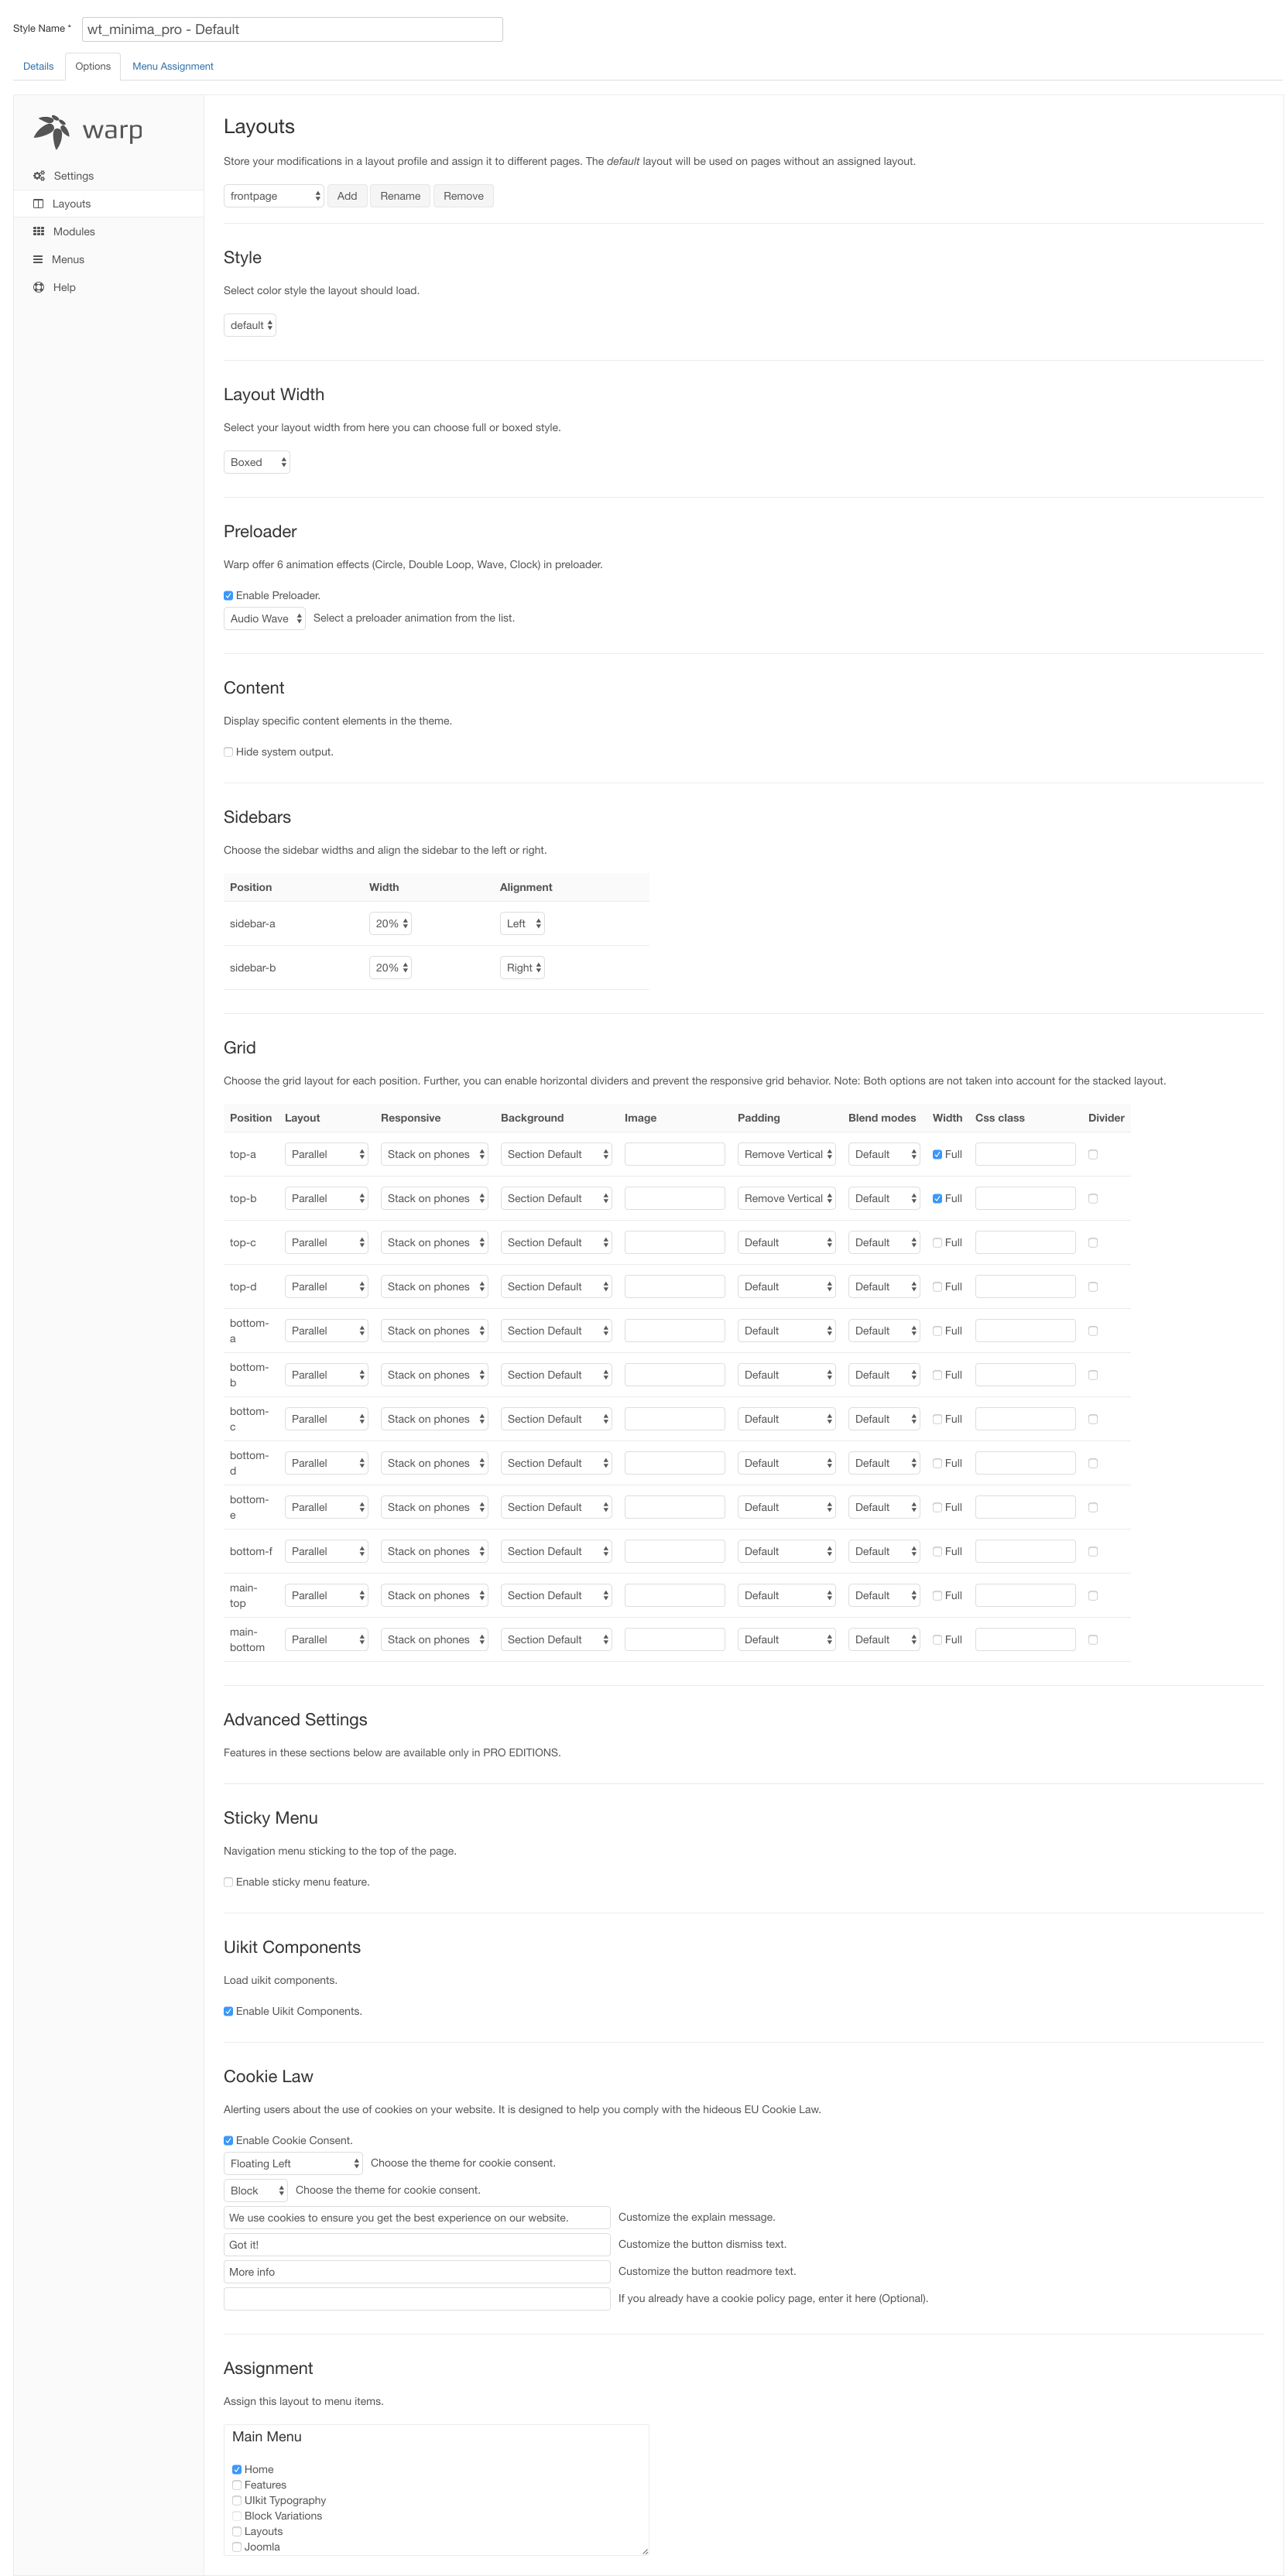
Layout Settings
The layout settings manage the positioning of different layout parts.
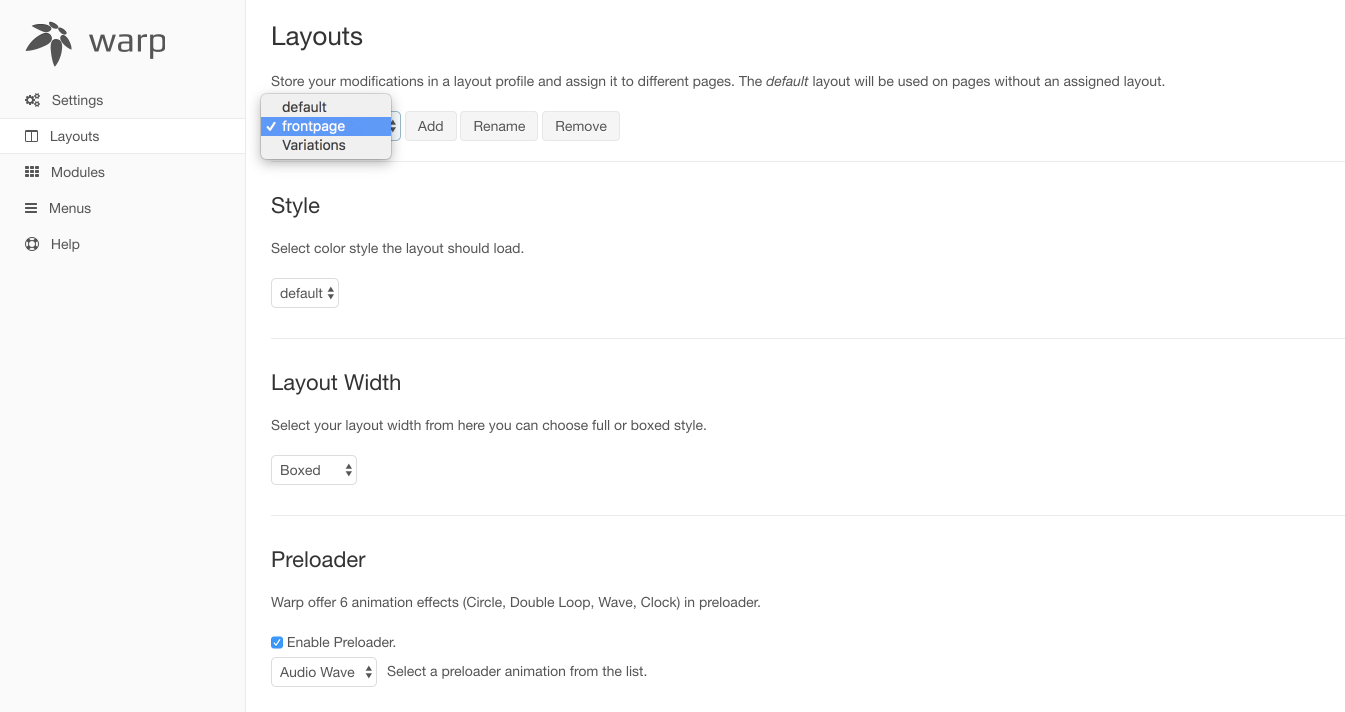
This section makes the arrangement of your content very easy and flexible. You can enable or disable system output, define the layout of the theme's widget or module positions and select a style you created in the customizer. Additionally you have the possibility to store your modifications in a layout profile and assign it to different pages.
Grid settings
This option enables you to assign a style to your layout. In addition with the customizer and the layout manager this makes styling your pages very flexible.
Content

This option allows you to hide the main system output. This is useful, if you want to position only widgets/modules on certain pages, without leaving redundant space.
Sidebars

The Warp framework provides the following layout options for the sidebars.
| Setting | Description |
|---|---|
| Width | Choose from the provided percent values to set the sidebar width. |
| Alignment | Define, whether the sidebar is published on the left or right side of the content. |
The sidebar settings allow you to create a fully functional multi-column layout. The only requirement is to publish a widget or module on a sidebar position to display the selected alignment.
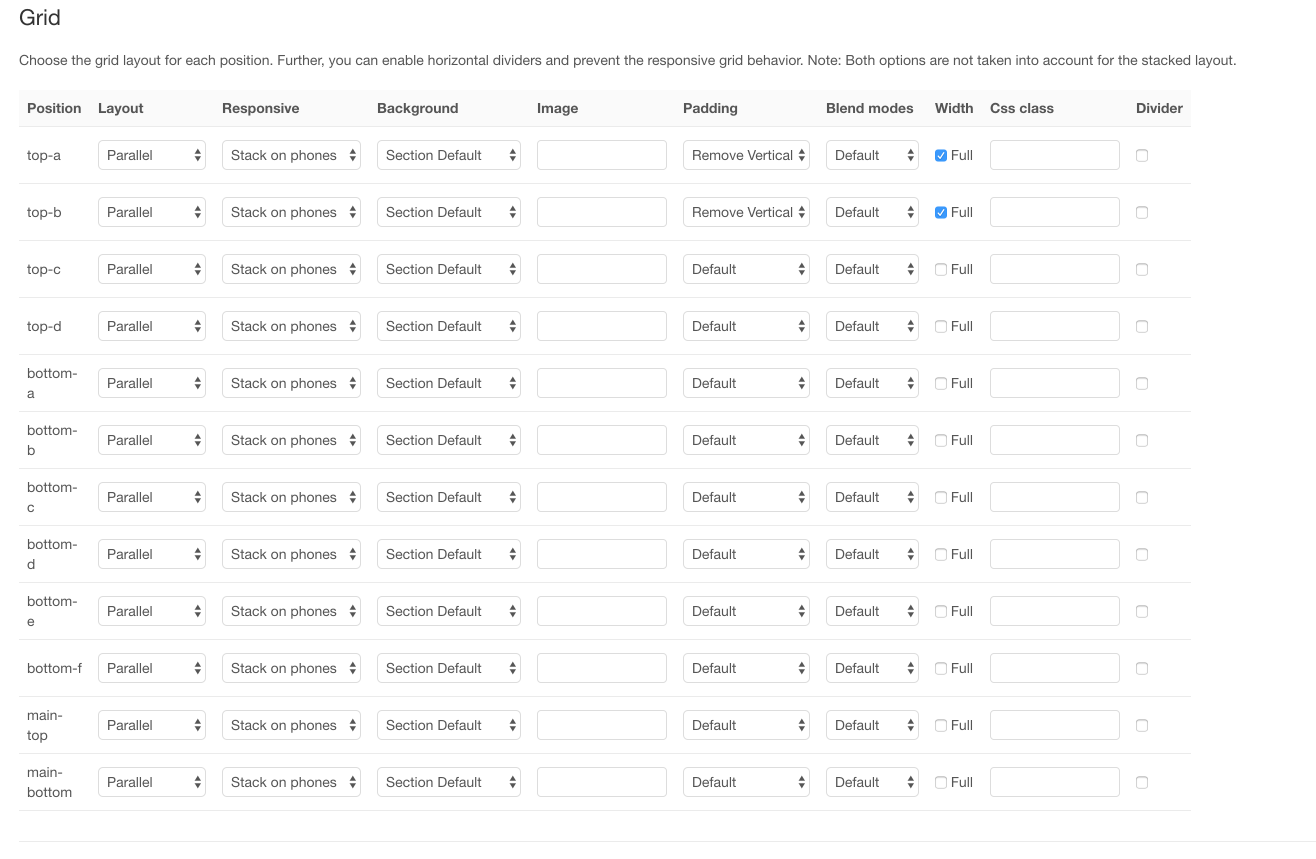
Grid
This table gives you an overview of the grid layout settings.

| Setting | Description |
|---|---|
| Layout | Define, whether the widgets or modules are positioned side-by-side, stacked vertically or first doubled. |
| Responsive | Define, on which devices the widgets or modules take up full width and stack vertically. |
| Divider | Add a vertical divider between parallel or first doubled widgets/modules to separate them from each other. |
For more information on widgets and modules, take a look at the Widgets/Modules tutorial.
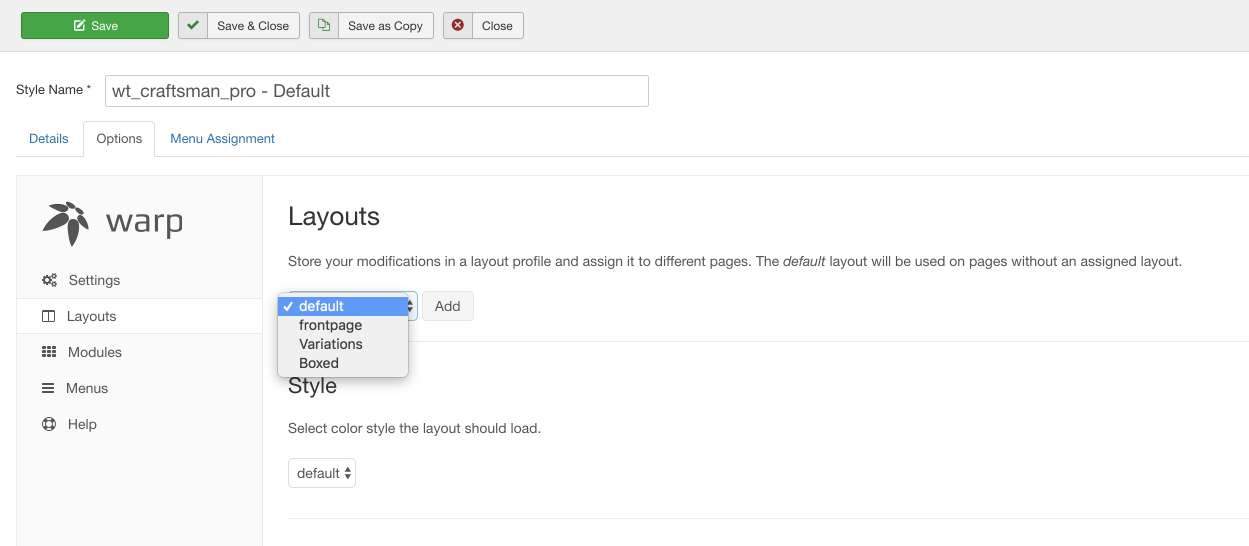
Layout Manager
The layout manager allows you to create new layouts and assign them to different pages. Warp provides a default layout as a reference.
How to create a new layout?
To create a new layout, follow these steps:
- Hit Add and enter a name to create a layout.
- That's it! You can start customizing your layout.
- Finally, assign your layout to the appropriate pages within the scrollable box at the bottom of the layout setting page.
Important You can't assign two different layouts to one page.
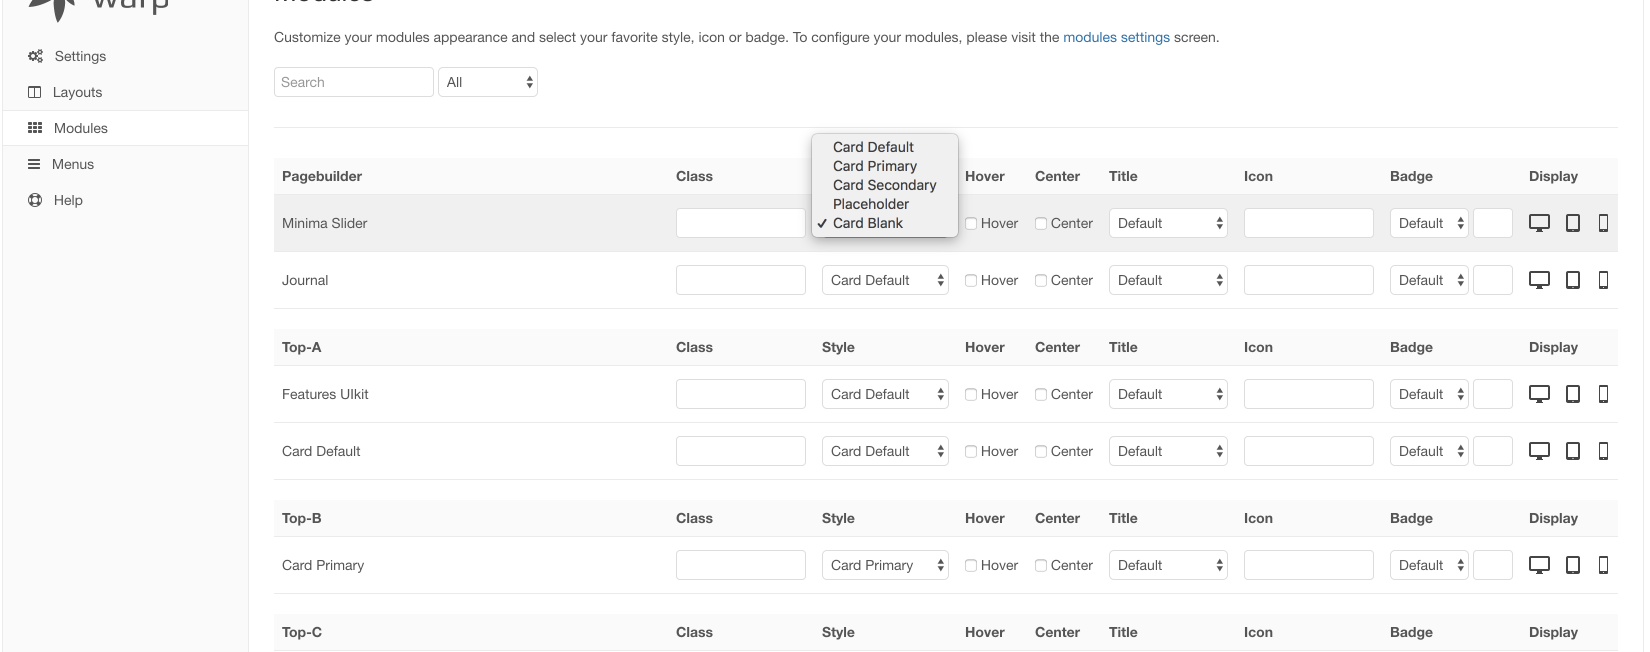
Widget/Module Settings
Manage your WordPress widget and Joomla module styles and settings.
Widgets or modules can be displayed in different styles with additional icons and badges. In the Warp Widgets/Modules overview, widgets and modules are grouped according to the positions in which they are published. Additionally, you can filter them by keyword and positions to which they are assigned.
Settings

This table gives you an overview of all available widget/module options.
| Setting | Description |
|---|---|
| Class | Allows you to add your own custom CSS classes. |
| Style | Lets you choose a widget/module preset style from the select box. |
| Icon | Allows you to select an icon from the icon preview. You can also enter a path to a custom image. In Joomla enter the full path, for example /images/MY-IMAGE.jpg. WordPress already looks into the /wp-content/uploads folder. So you only need your custom path, for example MY-IMAGE.jpg. |
| Badge | Adds a badge to your widget/module. Type in the text for the badge and select a color. |
| Display | Display or hide a widget/module on specific devices like desktops, tablets or phones. |
Specific WordPress Settings
| Setting | Description |
|---|---|
| Title | Displays or hides the widget or module title. |
| Assignment | Defines, on which pages the widget/module should be displayed by assigning it to the pending menu item. You can select multiple items by holding Ctrl-Key while clicking. |
Troubleshooting
How to update Warp Framework
Learn how to update your Warp theme without losing your customizations.
If a newer version of your theme or Warp is available, you will receive a notification in the theme settings. You can download the framework from Yoo or download it here
UPDATE WARP
- Create a copy of your theme's
/warpfolder. That way, you will have a backup in case the update fails. - Download any Warp 7 theme and unzip the package.
- Copy the
/warpfolder from the theme and replace the one in your theme with this one.
How to update templates/themes
We update our templates regularly to bring you more features, and improved stability and performance. So it's strongly recommended for you to keep up to date with the latest version and update your template.
The file verification in the theme settings shows all modified and missing files in your theme to help you detect which files you have customized before you start updating. Changes in Warp's administration area will generate the config.json, which is not shown in the file verification. So be sure to have a backup of that file. To update your theme, do the follow these steps.- First of all, make a backup of all your customized theme files, so you can recover modifications at any time
- Download the latest template/theme version via Member Area and extract the package to your Desktop.
- Copy all files to /templates/THEME-NAME for Joomla or /wp-content/themes/THEME-NAME for WordPress and replace all files
- Recover your modifications by merging your customized files with the new ones.
- Open Warp's administration area and hit Compile LESS.
Note We strongly recommend to create a new style for all modifications(or custom css code via custom.css file) and make a backup before updating. That way all your changes will be kept when updating your original theme files by replacing them. Learn more here.
Installation issues
Learn how to handle PHP issues during the installation process.Most of the time installation problems are due to limited resources, for example on shared hosting servers. Here's an overview of the PHP configuration settings you should check and increase, if needed.
You may need to allocate more resources for PHP by modifying the php.ini file directly. If this is not possible, you can try setting the PHP settings through a .htaccess file on your webserver. Though this also depends on your hosting server, if it allows the usage of .htaccess overrides.
File permission issues
Learn, how to handle file permission issues with your Warp theme.There are two ways of accessing files when working with Joomla or WordPress: either directly via your webserver or through an FTP client. Different files and directories have permissions specifying who can read, write or access them. Sometimes the permission settings of your webserver and your FTP client can collide, so that when trying to install an extension from the backend you are suddenly confronted with messages, like JFolder::create: Could not create directory or Directory not writable: /administrator/templates/system/ or you may not be able to save theme settings.
Change file permissions
To resolve these issues, you need to change the permissions of the affected files or directories.
Using your FTP client
- Open your FTP client or, if you don't have any, download FileZilla and install it.
- Use your FTP client to login to your server and browse to your webroot directory.
- Right click on the directory on which you want to change the permissions and click File Permissions...
- The Change File Attributes dialog lets you check different options or type in a numeric value like 755. Make sure the Recurse into subdirectories option is checked. Then hit OK.
Note Always avoid 777 permissions. If your webserver has problems with the CHMOD 755, you can also try 775 and lastly 777 in this order.
Use a Joomla extension to access your webserver
Using an FTP client may also change file ownership to the FTP user of the files or directories you changed the permissions on. This may cause problems on some webservers. To avoid this, you can use a Joomla component like eXtplorer to update the permission through the Joomla administration.
- Download the Joomla component eXtplorer and install it. It allows you to edit, delete, copy, rename, archive and unpack files and directories directly on your webserver.
- Login to your Joomla administration, go to the eXtplorer component and browse to the directory on which you want to change the permissions.
- Right click on the directory and choose Change Rights.
- Check the options as shown below. Make sure the Recurse into subdirectories option is checked. Then hit the Save button.
Find out more about file permissions in the Joomla documentation.
WordPress
Check out the WordPress documentation for more information on file permissions.
How to change favicon for theme/template
Learn how to change the favicon icon for theme/template.
For Joomla!: Upload your favicon icon to joomla/templates/template_name/
For WordPress: Upload your favicon icon to wordpress/wp-content/themes/theme-name/
Live Customizer
Live Customizer - enables you to change most aspects of the template without having to write any line of CSS.
How to use the customizer
By default, the customizer shows only a selected number of variables. Theses variables are the most used in the theme. There are different customizer modes to determine, to what detail you want to customize your theme.
- Login to the site’s administrator backend, go to Extensions > Template Manager.
- Click the template to edit, then click on Options tab.
- On the Settings vertical tab click on the Customizer button > the live customizer will appear with the options on the left and the site on the right.
- To see more advanced options, check the Advanced Mode checkbox > you will see more options appearing. On some of the headings, you’ll notice a ‘more’ link that lets you expand the options further.
- Once you are done, click on save.
- If you messed up the settings and you’d like to revert to the original, you can click on reset.
| Mode | Description |
|---|---|
| Advanced mode | Activating the advanced mode extends the default variables with additional developer variables, which are rarely adjusted. |
| More | In Advanced mode you can see a (More) button next to groups which displays all variables. The @ symbol indicates variables that are defined through other variables. |
Credits
This template uses the following images, javascript libraries, icons, plugins, modules, components, or other files as listed below. All the content relating to products, services and events are fictional and are designed to showcase a live site. All images, icons, and photos are copyrighted to their respective owners.- Warp Framework, UIkit by YOOtheme
- Stock images from billionphotos and Pexels
- ChronoForms
- Thanks Torbara for the Warp 7 Explained
